

Procreate is a good app for digital artwork usually, but additionally portrait portray particularly. There’s one thing uniquely daunting about staring into the eyes of a clean canvas, particularly when that canvas is destined to grow to be a face. However portrait portray in Procreate might be as thrilling as it’s intimidating. From nailing pores and skin tones to rendering plausible lighting and brushstrokes that seize character, it’s a fragile balancing act that even seasoned artists can discover overwhelming.However right here’s the excellent news: Procreate on iPad isn’t simply highly effective, it’s purpose-built for digital artists who wish to get private with their artwork – making it probably the greatest drawing apps on iPad. Procreate options fluid contact controls, responsive Apple Pencil help, and an intuitive interface, making it the best studio-on-the-go for creating every thing from conventional portraits to stylised character research. (Learn our information to the perfect digital artwork software program for desktop alternate options.)To assist make that first stroke slightly simpler, we turned to character and portrait artist Pauline Voss, by way of our sister journal ImagineFX, for a set of tried-and-tested ideas. Whether or not you’re studying tips on how to layer color for lifelike pores and skin or determining the perfect brush settings for expressive hair, these 10 Procreate strategies will kickstart your portrait portray and take your digital artwork to a brand new degree.
You could like
For extra artwork recommendation, learn our ideas for portray environments in Procreate artwork and our checklist of step-by-step Procreate tutorials.
1. Work darkish to mild
(Picture: © Pauline Voss)
Considered one of my favorite lighting strategies begins with inserting a colored Multiply layer on high of the entire portray. This pulls all of the native colors collectively and offers the picture an on the spot atmospheric base. I’ll use tender violets, dusty pinks, or teals, relying on the specified temper. From there, I’ll slowly begin to construct up the sunshine utilizing Add or Linear Dodge layers. This helps me to sculpt the sunshine whereas remaining accountable for the worth and distinction. It’s like transferring by way of fog: you begin at nighttime, and let the sunshine information your means.
2. Portray 3D info
(Picture: © Pauline Voss)
As an alternative of portray a visual mild supply, give attention to how mild interacts with the article itself. I block within the lit areas with a tough spherical or sq. brush, being attentive to the article’s 3D construction. Then I smudge or soften the perimeters to regulate transitions and form. I usually think about a primary 3D kind like a cylinder or sphere beneath and place the sunshine accordingly. Reasonable lighting will depend on understanding floor planes, so looking for appropriate references helps.
3. Extra mild sources for realism
(Picture: © Pauline Voss)
I wish to introduce a second or a number of mild sources and bounce lights in a picture. This will come from the bottom, close by objects, or ambient environment. I hold it much less intense than the primary mild and infrequently use a contrasting hue so as to add depth and visible curiosity. Utilizing a number of mild instructions makes the article really feel extra embedded within the scene. Usually, I’ve one Add Mix Mode layer, duplicate it, and apply a Gaussian Blur to boost the glow.
4. Rainbow Sparkles for a touch of color
(Picture: © Pauline Voss)
To create holographic sparkle results, paint sharp white shapes like starbursts or shards on a brand new layer. Set the layer to Add and use the Chromatic Aberration software, pushing the slider to the max, which splits the sunshine into refined RGB fringes. Lastly, apply Perspective Blur to stretch the form so the separate colors blur into one another. The end result appears like magical, prismatic mild, good for including highlights in eyes, round glowing components, or in spell results.
5. Customized Smudge brushes
(Picture: © Pauline Voss)
In Procreate, you possibly can flip any brush right into a Smudge software. Simply faucet the Smudge icon, then choose your required brush. Within the Brush settings, enhance the Smudge slider underneath Apple Pencil to 100% for full management. You can even import customized textures within the Grain settings to form the best way your brush smears. This allows you to mix areas with wealthy texture as an alternative of utilizing a tender spherical brush. I take advantage of this system to melt glow edges or mix values whereas sustaining a painterly, handcrafted really feel.
6. Paint saturated shadows
(Picture: © Pauline Voss)
Subsurface scattering occurs when mild penetrates translucent supplies like pores and skin, petals, or wax and diffuses. In Procreate, I exaggerate this impact by portray saturated reds, oranges, or pinks into areas the place mild would move by way of, like ears, fingertips, or flower edges. Tender mixing into close by shadows creates the phantasm of a glow from inside. This impact works particularly effectively when aiming for an ethereal look. It’s good for something delicate or natural.
7. Use Perspective or Movement Blur to create motion
(Picture: © Pauline Voss)
Perspective Blur and Movement Blur are highly effective instruments to counsel motion or depth immediately. I’ll duplicate a layer, apply certainly one of these blur modes, then softly erase components to regulate the place the movement hits. That is particularly helpful for creating flowing components like hair, material, mist, or ambient particles. You don’t must repaint every thing, as a refined directional blur makes your scene really feel extra cinematic and dynamic in seconds.
8. Shift the temper with Colour Stability
(Picture: © Pauline Voss)
The Colour Stability adjustment is certainly one of Procreate’s strongest instruments for atmospheric lighting. As an alternative of repainting, we will tweak the sliders for shadows, midtones, and highlights individually, shifting every subtly in the direction of a particular hue. For instance, pushing highlights into blue and shadows into purple immediately develops stress, whereas midtones in the direction of magenta add heat and a fantasy really feel. This adjustment acts like color grading in movie and might dramatically change the sunshine language of your picture with only a few strikes.
9. Utilizing Liquify for Natural magic
(Picture: © Pauline Voss)
The Liquify software is right for creating dreamy smoke trails, magical wisps or flowing mild. Begin with a tough form utilizing tender brushes on Add or Colour Dodge layers, then go to Changes>Liquify. Utilizing the Push, Increase and Twirl modes, form the glow into fluid, ribbon-like varieties. Tender or textured smudging breaks up the shapes much more.
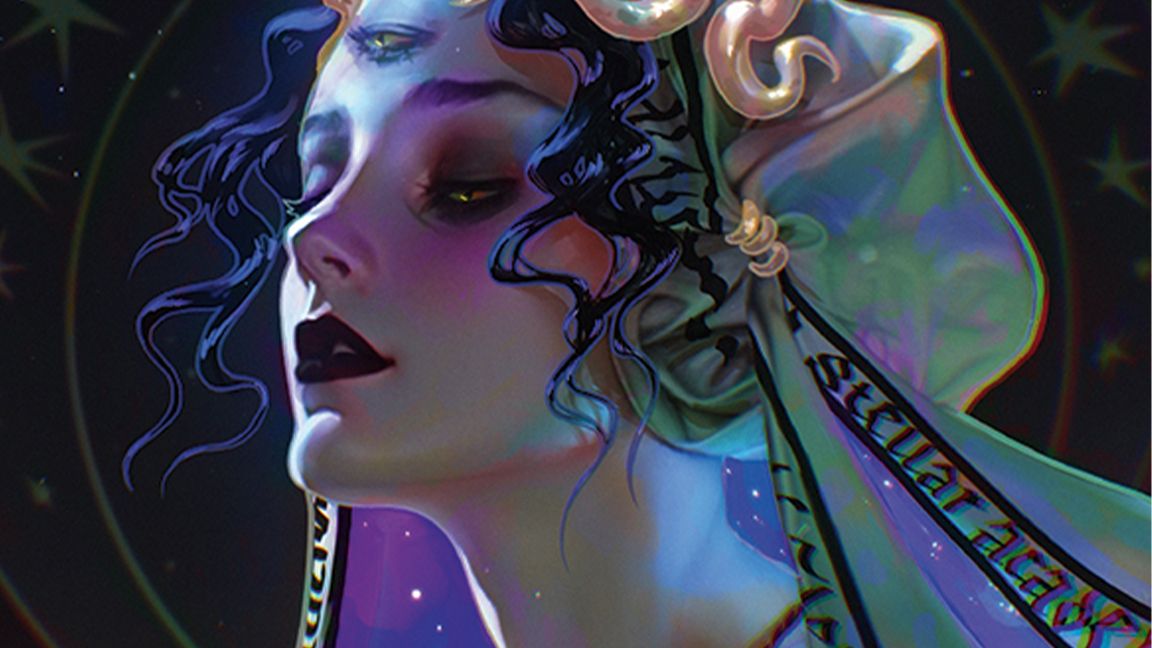
10. Add iridescence with Saturation
(Picture: © Pauline Voss)
To interrupt up massive, homogeneous areas and provides your artwork a pearlescent shimmer, paint wild, vibrant strokes on a separate layer, utilizing all colors of the rainbow. Set the layer to Saturation mode and scale back its opacity to round 10-20%. This retains the underlying worth and hue intact, whereas including delicate color variation that mimics iridescence. This method works particularly effectively on material, pores and skin, summary backgrounds, and glowing supplies.
This content material initially appeared in ImagineFX journal, the world’s main digital artwork and fantasy artwork journal. ImagineFX is on sale within the UK, Europe, United States, Canada, Australia and extra. Restricted numbers of ImagineFX print editions can be found for supply from our on-line retailer (the delivery prices are included in all costs).