

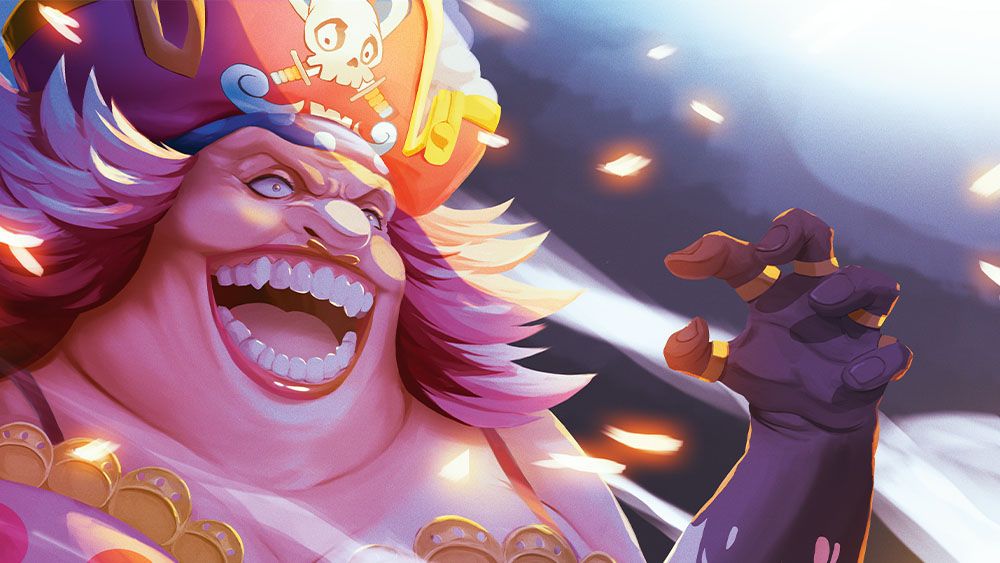
This fee was created for Pam Dougherty, the English voice actress of Charlotte Linlin, also called Large Mother, from One Piece. I used to be requested to take inspiration from a scene inside the anime the place Charlotte goes on a rampage!Nonetheless, this transient had a novel request. The artwork was to be created in a mode I hadn’t utilized in three years! A number of components had led me migrate to a extra line-art dependent model for shopper work and now right here I used to be, requested to make use of a course of I wasn’t satisfied can be used commercially. I used to be initially involved about how rusty I’d be however was relieved to see how a lot of my ability remained in muscle reminiscence.I even managed to adapt a few of what I’d realized from my common fee model into the creation of this picture. In the long run, the shopper was completely glad, and I used to be grateful to have the chance to aim one thing completely different and difficult.
You could like
Beneath I am going to talk about some key components that I feel made the piece, and supply some ideas for making use of them. And on the backside, I am going to define my basic course of. I labored in Clip Studio Paint, which is talked about in our information to the most effective digital artwork software program. You may also need probably the greatest drawing tablets.Hair styling
(Picture credit score: Sean Abbott)Setting the chalk brush to my Smudge instrument lets me shortly recommend strands inside the hair. The extent of element you add with this can rely on the quantity of realism you hope to attain. Don’t overdo it, because the Smudge instrument can get messy in the event you overwork an space.Promote the scene Even in small areas just like the eyes, I prefer to have a number of the atmosphere mirrored inside them. It’s a really tiny element, however little touches like this assist to promote the environment much more. Environments with sturdy gentle sources are a superb alternative to make the most of this.Give it actual feelImage 1 of two(Picture credit score: Sean Abbott)(Picture credit score: Sean Abbott)Distinction is necessary for creating plausible paintings. I’ve touched on distinction in values, however simply as necessary is the distinction used within the shapes and motion. Curved strains versus straight strains are a motif that I attempt to incorporate if potential. The movement of environmental components over Large Mother’s resolute determine additionally helps creates distinction.Each day design information, critiques, how-tos and extra, as picked by the editors.Complementary glowI often paint my highlights on a brand new layer above every little thing and use a refined outer glow to develop a sense of illumination. Be sure you select the color of the glow rigorously; it’s a helpful solution to complement the terminator (the boundary between the zone of sunshine and type of the shadow).Recommend a wider atmosphere
(Picture credit score: Sean Abbott)I like particles and results akin to smoke and cinders, each of which I’ve used right here. It may be a great way to recommend an atmosphere’s existence even when it isn’t proven, as was the case with this picture. The random motion of those components can also be nice for visible curiosity.BackgroundThe movement path of the smoke and cinders right here additionally function a solution to lead the viewer throughout the picture in direction of her expression, whereas the variation within the depth of subject additionally offers some measure of scale to the atmosphere.Hand gestures The shadows throughout the hand do greater than create distinction; they’re additionally a neat instrument for including a way of expression to the fingers. Using each curved and straight strains like this additionally add to the strain of the character’s expression.My course of for portray in Clip Studio Paint01. Early sketch
(Picture credit score: Sean Abbott)My sketching work is completed in Clip Studio Paint. I exploit fast, unfastened strokes with the Line brush to create a tough base for the pose. Subsequent, I decrease the opacity of that layer, creating a brand new layer above the place I then recreate the paintings, retaining the ultimate strains and including any final obligatory particulars. After that I merge the layers.02. Make it greyscale
(Picture credit score: Sean Abbott)I keep away from color at first. Generally eradicating that distraction permits me to see my contrasting values extra clearly. In case your picture isn’t coherent in greyscale, color gained’t make it any clearer. I take time to separate gentle from shadow and foreground from background. A decrease background distinction helps the foreground stand out.03. Add the color
(Picture credit score: Sean Abbott)After creating a brand new color layer over my greyscale, I work on getting a primary palette going. Color layers don’t at all times provide the color you want, so you could have to tweak the hue or saturation barely. When you’re at some extent the place you’re completely satisfied, you may merge the layers and paint in all of the refined little variations in color.For extra inspiration, see the early character design sketches for DreamWorks’ The Unhealthy Guys 2. You may also get pleasure from tying conventional artwork by following our piece on how to attract an dinosaur with pencils.This text initially appeared in ImagineFX. Subscribe to ImagineFX to by no means miss a problem. Print and digital subscriptions accessible.For extra artwork workshops, do not miss Thomas Elliott’s step-by-step information to how he made the online game cowl artwork for Doom: The Darkish Ages.