

Portray greyscale photographs forces you to take a special method to your digital artwork course of and, it is often a lot tougher than portray in full color. Nonetheless, I feel there are two good causes for giving portray in black and white a go.First, a greyscale picture offers flexibility. You may deal with it as a stage of the portray course of, creating one thing that you simply’ll add color to later. It is a good answer whenever you’re not sure about what hues to decide on for the piece or are good at rendering varieties however nonetheless have some doubts about your colors.Second, portray in greyscale locations the emphasis on lighting and composition fairly than smaller particulars, so it’s nice for strengthening a picture’s temper, particularly for dramatic or melancholic scenes. So the best way to method portray in greyscale? Beneath, I’ll define what I see as the important thing parts, ranging from composition and lighting idea to texturing and closing touches.
Chances are you’ll like
If you wish to use greyscale as a foundation for later including color, I’ll additionally clarify the best way to apply hues to realize energetic results. See our guides to the very best digital artwork software program and both the very best drawing tablets or the very best laptops for drawing in case you want the important instruments to place all this into motion. Within the meantime, let’s dive in.
01. Mild idea for greyscale portray
In greyscale portray, gentle is your predominant instrument for creating the correct temper. This picture exhibits two fundamental sorts of lighting. The primary is directional – a robust, condensed gentle emitted from one level. Second, there’s ambient gentle, which is omnipresent and impacts each a part of the lit object with the identical depth. Then there are two sorts of shadow. First is the solid shadow, which is created by an object that’s blocking gentle. Second is the shape shadow, which is created on the facet of an object that’s affected by gentle however going through away from it.
02. Get sketching
I discover it helpful to do a fast sketch to assist me keep in mind the course and depth of a selected gentle. I’d advocate utilizing extremely textured, opaque brushes for marking shapes in greyscale. I’ve executed this sketch in Painter 7 utilizing a fundamental spherical brush and the Loaded Palette Knife with an opacity of between 30 and 50 per cent.
03: Make issues clear in greyscale portray
One drawback that’s particular to portray in greyscale is differentiating between parts in a picture. Colors with the identical saturation and brightness ranges will look similar when desaturated. So in greyscale work it’s essential to range lighter and darker parts greater than you’ll when portray in color. It’s additionally necessary to make textures and surfaces distinctive. I’ll undergo some texturing tips later – for now, use naturally textured brushes as a foundation for making use of subsequent particulars. Any Oil brush from Painter or a ragged Arduous Spherical brush from Photoshop will do the job.
04: Lighting in observe
As soon as the sketch begins to take form, pay shut consideration to the place you set your shadows. As a result of there’s no color to distract consideration from the shape’s form, portray turns into very similar to sculpting – each object needs to be moulded with nice care to stay plausible. It’s useful to shade the shapes very typically, making use of fundamental kind shadows as you sketch.
05: Ins and outs
If you’re glad that the fundamental object is prepared, begin desirous about detailed shadowing. To create a plausible picture, each component you shade needs to be understood and analysed. Solely when you visualise an object in three dimensions will you be capable to shade it appropriately. To grasp the construction of an object higher, attempt portray a fundamental wireframe on prime of your character to focus on the principle convexities and concavities of the article’s kind. In my portray’s case, the character is urgent her fingers towards her cheeks and this creates a whole lot of further construction to cope with.
06: Pushing the highlights
You most likely know the final colour-shading rule: by no means shade with white and black. This additionally applies to greyscale portray, as including the strongest shades reduces the effectiveness of your composition, even in case you use them on a low opacity. Transition shades needs to be refined, with near-white and near-black used solely sometimes. The opacity of my enrichment strokes is between 10 and 25 per cent always.
07. Methods to dodge and burn in greyscale
In color portray, using Dodge and Burn is historically restricted to steel and hair highlights, in addition to enriching directional gentle results on environmental objects. Nonetheless, with greyscale there are just a few extra choices out there to you, like pores and skin shading. If the character’s pores and skin is strongly affected by gentle, you may dodge (brighten) – with nice care: simply an additional spotlight blob right here and there.
08. Enrichment in observe
Having realized about color enrichment guidelines, it’s time to place them into observe. Select some textured brushes and attempt to depict all the face’s structural nuances utilizing the wireframe you created earlier. Add darker greys everywhere in the concave areas and lighter greys over the convexities. Attempt to persist with extra textured brushes. If the shading begins wanting too tough, mix it in with decrease opacity strokes whereas nonetheless utilizing a texture brush. As a common rule, airbrushes needs to be averted at this stage of the portray.
09. Fundamentals of stylisation
When you’ve settled in your character’s fundamental kind, it’s a superb time to consider element texturing. Greyscale appears good with a program’s extra inventive setting, encouraging looser brushstrokes. And maybe due to bolder gentle sources, it additionally boosts the general realism of the piece, which is perhaps an opportunity to implement finer detailing and texturing. In my piece, I determine to do a little bit of each and element areas of curiosity – her eyes and hair – with way more care than different parts. I need to give a extra painterly really feel to her fingers, brow, elbow and chest to steadiness the piece stylistically.
10: Additional stylisation
Just a few good brushes that will help you texturise and/or stylise your characters are arduous spherical, opacity and pen-pressure managed ones in Photoshop, or all sorts of inks and palette knives in Painter. The important thing right here is to make use of a mess of brushes: combine textured with easy, arduous with comfortable and so forth. When finalising the article, introduce some Airbrush strokes to shine any transitions. Keep in mind, tougher textures have a tendency to face out extra, so that you would possibly need to depart your strokes bolder within the locations you most need the viewer to focus on.
11. Finalising greyscale
For those who’re ending the textures in Photoshop, hold your second view window open. It lets you see how the textures look when zoomed out, and is particularly useful in case you’re making your picture photorealistic. That mentioned, it’s a good suggestion to over-texture the portray by an enormous margin. Areas of focus profit from intense brush texturing. Right here I enhance the extent of element within the hair considerably, which appears to work simply nice.
12. Including color to greyscale work
You may both depart your picture greyscale or apply color to it. For those who determine so as to add color, first create a brand new layer. Now you may set the layer’s mode to certainly one of your selecting, otherwise you depart the mode on Regular and use brush modes as an alternative. This picture exhibits the identical beige color utilized on prime of the greyscale with totally different layer modes.
13. Color appreciation
Shading human pores and skin is difficult on a greyscale picture and there’s a superb probability that it’ll find yourself wanting muddy. First, merge your gray portray for simpler layer administration. As a result of the trick to making use of color is utilizing numerous totally different brush/layer modes, you would possibly need to persist with Brush mode. Create a color palette: decide a midtone, a few midtone enrichment tones in addition to just a few spotlight and shadow hues. Then apply the midtone utilizing Colour mode. When you’ve executed this, begin making use of shadows on Multiply and Colour burn modes on a low opacity. Highlights work finest when utilized with Display and Gentle gentle. Lastly, use variations of your midtone for color enrichment, making use of strokes in Colour, Pin gentle and Luminosity modes.
14. Finalising color software
In fact, colouring greyscale is a matter of desire and totally different layer modes can be utilized in several methods, however there’s one last item to recollect. For those who’ve created a boldly textured object in black and white, don’t use extremely textured brushes when making use of color. Whereas a typical airbrush will likely be too comfortable and its subtle edges will make it arduous to maintain to the perimeters of the colored objects, a Regular Spherical brush will likely be too arduous. It’s due to this fact finest to make use of a Arduous Spherical brush in Photoshop with barely softened edges. Painter’s Airbrush will even carry out the job effectively.
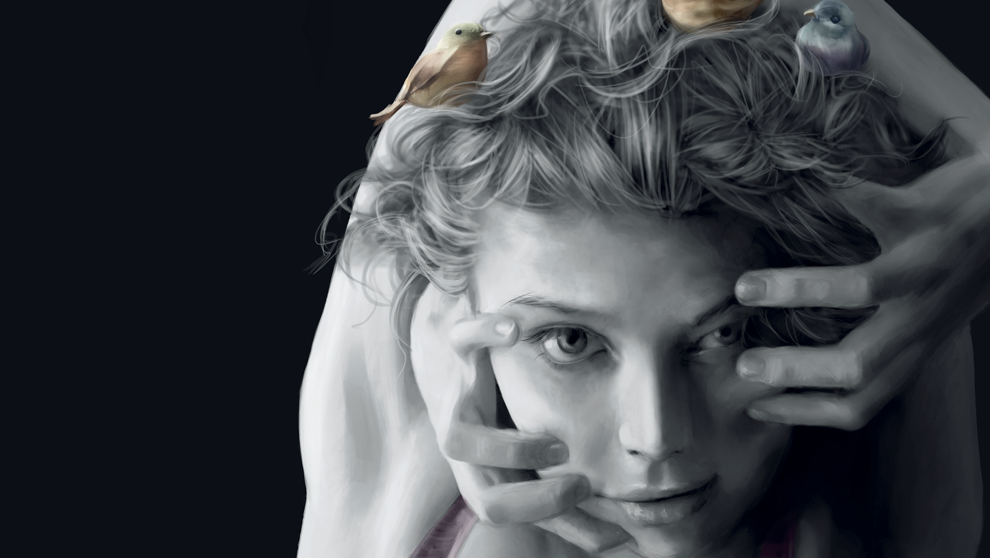
15. Ultimate touches in greyscale portray
Ultimately, I determine to combine some color into my greyscale portray so as to add emphasis and provides the piece steadiness. After having executed these last-minute color changes to the piece, I steadiness the distinction barely to strengthen the temper. As a common rule, earlier than ending I at all times flip the portray to seek for any hidden anatomical errors. As soon as that’s executed, I can lay down my pen and contemplate the portray completed! For extra suggestions , see our tutorial on the best way to paint material and steel textures in digital artwork.
Do you might have a digital artwork trick or hack? Share your recommendation within the feedback under.